

Critical Steps To Achieve Best Practices for Editing Virtual Event Videos
With the rise of virtual events, the need for high-quality video editing has become more important than ever before. Whether you are recording a live stream, a webinar, or a virtual conference, the way you edit your video can greatly impact the success of your event. In this article, we will outline critical steps to achieve best practices for editing virtual event videos.
Step 1: Organize Your Footage
The first step in editing a virtual event video is to organize your footage. This means importing all of your video files into a video editing software program and creating a timeline. It is essential to label each clip accurately and put them in chronological order. This will make it easier to find the footage you need when it comes time to edit. Additionally, using a tool like a storyboard can help you visualize how the footage should be ordered and edited.
Step 2: Trim Your Clips
The next step is to trim your clips. This means removing any unnecessary footage that does not contribute to the story or message of your virtual event. Be mindful of pacing, and cut out any parts that drag on or distract from the main points. This is also a good time to delete any technical difficulties or glitches that occurred during the event.
Step 3: Add Transitions and Effects
Once you have trimmed your clips, the next step is to add transitions and effects. Transitions are a way to smoothly move between clips, and effects can enhance the visual impact of your video. Be careful not to overdo it, as too many transitions or effects can be distracting and take away from the content of the event.
Step 4: Incorporate B-roll Footage
B-roll footage is an essential part of any virtual event video. B-roll refers to additional footage that is not the main event but is still relevant to the story or message. This can include footage of the event venue, audience reactions, or shots of the speaker’s environment. Incorporating B-roll footage can make the video more engaging and add context to the event.
Step 5: Add Music and Sound Effects
Adding music and sound effects can help to set the tone and mood of your virtual event video. Choose music that complements the theme of the event and is not distracting or overwhelming. Sound effects can also be used to enhance the visual impact of the video. Be sure to adjust the volume of the music and sound effects to balance them with the dialogue and other audio in the video.
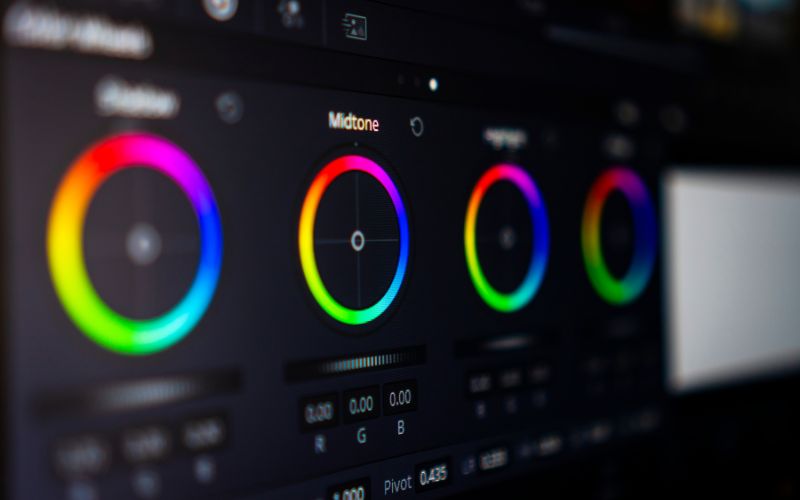
Step 6: Color Correct and Grade Your Footage
Color correction and grading are essential steps in achieving a professional-looking virtual event video. Color correction involves adjusting the color balance and exposure of your footage, while grading involves giving the footage a specific look or style. Use color grading software to adjust the brightness, contrast, and saturation of your footage until it looks consistent and visually appealing.
Step 7: Add Titles and Lower Thirds
Titles and lower thirds are effective ways to communicate information to your audience. Titles can be used to introduce speakers, highlight key points, and add context to the video. Lower thirds are a type of title that appears at the bottom of the screen and typically includes the speaker’s name and job title. Be sure to use legible fonts and colors that are easy to read.
Step 8: Review and Revise
After completing your initial edit, take the time to review and revise your video. Watch the video from start to finish and make a note of any areas that need improvement. Be willing to make changes and adjust the edit until it meets your standards. If possible, get feedback from others to see how they respond to the video.
Step 9: Export and Share
Once you are satisfied with the final edit, the next step is to export and share your virtual event video. Choose the appropriate file format and resolution based.

Related Blogs

How To Create a Successful Video Marketing Campaign
How To Create a Successful Video Marketing Campaign Video marketing has become a crucial tool for businesses looking [...]

Tips for Shooting High-Quality Videos With a Smartphone
Tips for Shooting High-Quality Videos With a Smartphone With advancements in technology, it is now possible to capture [...]
The Importance of Color Grading In Post-Production
The Importance of Color Grading In Post-Production Color grading is a crucial step in post-production for any film [...]
 (1)")